全文检索是计算机程序通过扫描文章中的每一个词;对每一个词建立一个索引;指明该词在文章中出现的次数和位置。当用户查询时根据建立的索引查找;类似于通过字典的检索字表查字的过程。
索: 建立索引 文本---->切分 —> 词 文章出现过 出现多少次
检索: 查询 关键词—> 索引中–> 符合条件文章 相关度排序
全文检索(Full-Text Retrieval)以文本作为检索对象;找出含有指定词汇的文本。全面、准确和快速是衡量全文检索系统的关键指标。
只处理文本、不处理语义搜索时英文不区分大小写结果列表有相关度排序 ElasticSearch 简称 ES ;是基于Apache Lucene构建的开源搜索引擎;是当前最流行的企业级搜索引擎。Lucene本身就可以被认为迄今为止性能最好的一款开源搜索引擎工具包;但是lucene的API相对复杂;需要深厚的搜索理论。很难集成到实际的应用中去。ES是采用java语言编写;提供了简单易用的RestFul API;开发者可以使用其简单的RestFul API;开发相关的搜索功能;从而避免lucene的复杂性。
多年前;一个叫做Shay Banon的刚结婚不久的失业开发者;由于妻子要去伦敦学习厨师;他便跟着也去了。在他找工作的过程中;为了给妻子构建一个食谱的搜索引擎;他开始构建一个早期版本的Lucene。
直接基于Lucene工作会比较困难;所以Shay开始抽象Lucene代码以便Java程序员可以在应用中添加搜索功能。他发布了他的第一个开源项目;叫做“Compass”。
后来Shay找到一份工作;这份工作处在高性能和内存数据网格的分布式环境中;因此高性能的、实时的、分布式的搜索引擎也是理所当然需要的。然后他决定重写Compass库使其成为一个独立的服务叫做Elasticsearch。
第一个公开版本出现在2010年2月;在那之后Elasticsearch已经成为Github上最受欢迎的项目之一;代码贡献者超过300人。一家主营Elasticsearch的公司就此成立;他们一边提供商业支持一边开发新功能;不过Elasticsearch将永远开源且对所有人可用。
Shay的妻子依旧等待着她的食谱搜索……
目前国内大厂几乎无一不用Elasticsearch;阿里;腾讯;京东;美团 等等 …
# 0.环境准备
- centos7.x;、ubuntu、windows、macos
- 安装jdk11.0; 并配置环境变量 jdk11   要求安装jdk11;以上版本的java环境

# 0.1 安装jdk11.0;以上版本的java环境

# 1.下载ES
- https://www.elastic.co/cn/start

# 2.安装ES不能使用root用户,创建普通用户,使用普通用户安装
# 添加用户名
$ useradd lb
# 修改密码
$ passwd lb

# 之后用ssh工具使用普通用户登录并将elasticsearch安装包上传到linux中

# 3.解压缩ES安装包
$ tar -zxvf elasticsearch-7.14.0-linux-x86_64.tar.gz
$ ll
总用量 650168
drwxr-xr-x. 10 chenyn chenyn       167 8月  16 11:07 elasticsearch-7.14.0
# 4.查看ES解压包中目录结构
[chenyn;localhost elasticsearch-7.14.0]$ ll
- bin 		启动ES服务脚本目录
- config  ES配置文件的目录
- data    ES的数据存放目录
- jdk     ES提供需要指定的jdk目录
- lib     ES依赖第三方库的目录
- logs    ES的日志目录
- modules 模块的目录
- plugins 插件目录

# 5.启动ES服务
# 前台方式启动elasticsearch
./elasticsearch-7.14.0/bin/elasticsearch

# 后台方式启动elasticsearch,不占用窗口
 ./elasticsearch-7.14.0/bin/elasticsearch -d

# 后台启动如何停止elasticsearch服务
 ps aux|grep elasticsearch                -- 搜索elasticsearch进程id
 kill -9 es的进程id											  -- 杀死es进程


- 这个错误是系统jdk版本与es要求jdk版本不一致,es默认需要jdk11以上版本,当前系统使用的jdk8,需要从新安装jdk11才行!
- 解决方案:
	1.安装jdk11; 配置环境变量、
	2.ES包中jdk目录就是es需要的jdk,只需要将这个目录配置到ES_JAVA_HOME环境变即可、
# 6.配置环境变量
$ vim /etc/profile
- export ES_JAVA_HOME=指定为ES安装目录中jdk目录
- source /etc/profile

# 7.重新启动ES服务

注:前台方式启动的话,如果想停止直接 ctrl ; c

# 8.ES启动默认监听9200端口,访问9200
$ curl http://localhost:9200

# 0. 注:开启elasticsearch远程访问权限时需要提前关闭elasticsearch服务

# 1.默认ES无法使用主机ip进行远程连接,需要开启远程连接权限
- 修改ES安装包中config/elasticsearch.yml配置文件
$ cd elasticsearch-7.14.0/config
$ vim elasticsearch.yml

# 2.重新启动ES服务
- ./elasticsearch
- 启动出现如下错误:
	;bootstrap check failure [1] of [4]: max file descriptors [4096] for elasticsearch process is too low, increase to at least [65535]
	;bootstrap check failure [2] of [4]: max number of threads [3802] for user [chenyn] is too low, increase to at least [4096]
	;bootstrap check failure [3] of [4]: max virtual memory areas vm.max_map_count [65530] is too low, increase to at least [262144]
	;bootstrap check failure [4] of [4]: the default discovery settings are unsuitable for production use; at least one of [discovery.seed_hosts, discovery.seed_providers

# 3.解决错误 1 [最大虚拟内存] 注:需要在root用户下修改错误,因为普通用户不允许修改
$ vim /etc/security/limits.conf
# 在最后面追加下面内容
*               soft    nofile          65536
*               hard    nofile          65536
*               soft    nproc           4096
*               hard    nproc           4096
# 退出重新登录检测配置是否生效:
ulimit -Hn
ulimit -Sn
ulimit -Hu
ulimit -Su

# 3.解决错误 2 注:需要在root用户下修改错误,因为普通用户不允许修改
#进入limits.d目录下修改配置文件。
$ vim /etc/security/limits.d/20-nproc.conf
# 修改为
启动ES用户名 soft nproc 4096

例: lb soft nproc 4096

# 3.解决错误 3 注:需要在root用户下修改错误,因为普通用户不允许修改
# 编辑sysctl.conf文件
$ vim /etc/sysctl.conf
vm.max_map_count=655360 		#centos7 系统
// vm.max_map_count=262144     #ubuntu 系统
# 执行以下命令生效;
$ sysctl -p

# 3.解决错误 4 注: 在普通用户下修改
# 编辑elasticsearch.yml配置文件 (es默认是以集群方式启动,修改配置文件使其以单节点方式启动)
$ vim elasticsearch-7.14.0/config/elasticsearch.yml
cluster.initial_master_nodes: [;node-1;]

# 4.重启启动ES服务,并通过浏览器访问   注:只有普通用户才能启动es,root用户不能启动es
192.168.204.137:9200
{
  ;name; : ;localhost.localdomain;,
  ;cluster_name; : ;elasticsearch;,
  ;cluster_uuid; : ;GgxAPEXTSWCZN6vES6uvvQ;,
  ;version; : {
    ;number; : ;7.14.0;,
    ;build_flavor; : ;default;,
    ;build_type; : ;tar;,
    ;build_hash; : ;dd5a0a2acaa2045ff9624f3729fc8a6f40835aa1;,
    ;build_date; : ;2021-07-29T20:49:32.864135063Z;,
    ;build_snapshot; : false,
    ;lucene_version; : ;8.9.0;,
    ;minimum_wire_compatibility_version; : ;6.8.0;,
    ;minimum_index_compatibility_version; : ;6.0.0-beta1;
  },
  ;tagline; : ;You Know, for Search;
}

# 1.获取镜像
- docker pull elasticsearch:7.14.0

# 2.运行es
- docker run -d -p 9200:9200 -p 9300:9300  -e ;discovery.type=single-node;  elasticsearch:7.14.0

# 3.访问ES
- http://192.168.204.137:9200

Kibana navicat是一个针对Elasticsearch mysql的开源分析及可视化平台;使用Kibana可以查询、查看并与存储在ES索引的数据进行交互操作;使用Kibana能执行高级的数据分析;并能以图表、表格和地图的形式查看数据。
Kibana的版本一定要和Elasticsearch版本一致, 比如 ES 版本是 7.14.0;Kibana的版本一定也要是 7.14.0 ,与其对应。
Kibana的安装要求ES必须先启动起来;因为ES只能在普通用户启动;所以Kibana也只能在普通用户启动(传统方式,Kibbna只能以普通用户启动,如果使用docker方式安装可以使用root用户启动)。
# 1. 下载Kibana并上传到Linux中
- https://www.elastic.co/downloads/kibana

# 2. 安装下载的kibana
- $ tar -zxvf kibana-7.14.0-linux-x86_64.tar.gz

# 3. 编辑kibana配置文件
- $ cd kibana-7.14.0-linux-x86_64/config/								-- 进入安装目录中的配置目录
- $ vim kibana.yml																	    -- 编辑配置文件
# 4. 修改如下配置
- server.host: ;0.0.0.0;                								 -- 开启kibana远程访问
- elasticsearch.hosts: [;http://localhost:9200;]   			 -- ES服务器地址

# 5. 启动kibana
- cd kibana-7.14.0-linux-x86_64/bin
- ./kibana

# 6. 访问kibana的web界面
- http://192.168.204.137:5601/         # kibana默认端口为5601,使用云服务器的话记得开启5601端口
# 1.获取镜像
- docker pull kibana:7.14.0

# 2.运行kibana
- docker run -d  --name kibana -p 5601:5601 kibana:7.14.0

# 3.进入容器连接到ES,重启kibana容器,访问
- docker exec -it kibbna的容器id bash					-- 进入Kibbna容器内部
- cd config   																-- 进入Kibbna容器内部的配置文件目录
- vi kibana.yml															-- 编辑配置文件

修改配置文件,指明elasticsearch服务所在的地址

# 4. 重启Kibbna
docker restart Kibbna容器的id

# 5. 浏览器访问查看是否启动成功
- http://192.168.204.137:5601


注
# 6.基于数据卷加载配置文件方式运行[启动Kibbna之后无需再修改配置文件再重启]
- a.从容器复制kibana配置文件出来
- b.修改配置文件为对应ES服务器地址
- c.通过数据卷加载配置文件方式启动
  ;docker run -d -v /root/kibana.yml:/usr/share/kibana/config/kibana.yml  --name kibana -p 5601:5601 kibana:7.14.0
# 创建 docker-compose.yml 配置文件
vim docker-compose.yml
version: ;3.8;
volumes:
  data:
  config:
  plugin:
networks:
  es:
services:
  elasticsearch:
    image: elasticsearch:7.14.0
    ports:
      - ;9200:9200;
      - ;9300:9300;
    networks:
      - ;es;
    environment:
      - ;discovery.type=single-node;
      - ;ES_JAVA_OPTS=-Xms512m -Xmx512m;
    volumes:
      - data:/usr/share/elasticsearch/data
      - config:/usr/share/elasticsearch/config
      - plugin:/usr/share/elasticsearch/plugins

  kibana:
    image: kibana:7.14.0
    ports:
      - ;5601:5601;
    networks:
      - ;es;
    volumes:
      - ./kibana.yml:/usr/share/kibana/config/kibana.yml
# kibana配置文件 kibana.yml ;连接到ES
vim kibana.yml


server.host: ;0;
server.shutdownTimeout: ;5s;
elasticsearch.hosts: [ ;http://elasticsearch:9200; ]
monitoring.ui.container.elasticsearch.enabled: true


#	注:因为docker-compose里有elasticsearch和Kibbna两个服务,两个服务之间可以使用服务名表示服务的ip地址,所以上面配置文件中的elasticsearch在启动时候会转化为elasticsearch所在服务的地址.

# 使用 docker-compose up -d   启动当前目录的docker-compose.yml配置的docker-compose
一个索引就是一个拥有几分相似特征的文档的集合。比如说;你可以有一个商品数据的索引;一个订单数据的索引;还有一个用户数据的索引。一个索引由一个名字来标识(必须全部是小写字母的)**;**并且当我们要对这个索引中的文档进行索引、搜索、更新和删除的时候;都要使用到这个名字。
映射是定义一个文档和它所包含的字段如何被存储和索引的过程。在默认配置下;ES可以根据插入的数据自动地创建mapping;也可以手动创建mapping。 mapping中主要包括字段名、字段类型等
文档是索引中存储的一条条数据。一条文档是一个可被索引的最小单元。ES中的文档采用了轻量级的JSON格式数据来表示。
# 1.创建索引
- PUT /索引名 ====> PUT /products
- 注意:
		1.ES中索引健康转态  red(索引不可用) 、yellwo(索引可用,存在风险)、green(健康)
		2.默认ES在创建索引时会为索引创建1个备份索引和一个primary索引

# 2.创建索引 进行索引分片配置
PUT /orders
{
  ;settings;: {
    ;number_of_shards;: 1, #指定主分片的数量
    ;number_of_replicas;: 0 #指定副本分片的数量
  }
}


注:
/*

;number_of_shards;: 1,  	 	表示主分片的数量
;number_of_replicas;: 0    	表示指定副本分片的数量

*/


# 查看es中的索引
GET /_cat/indices

# 查询索引(显示返回结果的标题)
- GET /_cat/indices?v

# 3.删除索引
- DELETE /索引名 =====> DELETE /products
- DELETE /*     ;*代表通配符,代表所有索引;

注;索引只能被创建、查询、删除;不能被修改
注:映射是不允许删除和修改的,如果创建的时候出现问题,那就只能删除索引之后重新创建
字符串类型: keyword 关键字 关键词 、text 一段文本
数字类型;integer 、long
小数类型;float 、double
布尔类型;boolean
日期类型;date
# 1.创建索引&映射
PUT /products
{
  ;settings;: {
    ;number_of_shards;: 1,
    ;number_of_replicas;: 0
  },
  ;mappings;: {
    ;properties;: {
      ;title;:{
        ;type;: ;keyword;
      },
      ;price;:{
        ;type;: ;double;
      },
      ;created_at;:{
        ;type;: ;date;
      },
      ;description;:{
        ;type;: ;text;
      }
    }
  }
}

说明: ES中支持字段类型非常丰富;如;text、keyword、integer、long、ip 等。更多参见https://www.elastic.co/guide/en/elasticsearch/reference/7.15/mapping-types.html
# 1.查看某个索引的映射
- GET /索引名/_mapping =====> GET /products/_mapping

# 添加文档操作,手动指定文档_id
POST /products/_doc/1
{
  ;title;:;iphone13;,
  ;price;:8999.99,
  ;created_at;:;2021-09-15;,
  ;description;:;iPhone 13屏幕采用6.1英寸OLED屏幕。;
}
# 添加文档操作,自动生成文档_id
POST /products/_doc/
{
  ;title;:;iphone14;,
  ;price;:8999.99,
  ;created_at;:;2021-09-15;,
  ;description;:;iPhone 13屏幕采用6.8英寸OLED屏幕;
}
# 添加文档之后返回的结果
{
  ;_index; : ;products;,
  ;_type; : ;_doc;,
  ;_id; : ;sjfYnXwBVVbJgt24PlVU;,
  ;_version; : 1,
  ;result; : ;created;,
  ;_shards; : {
    ;total; : 1,
    ;successful; : 1,
    ;failed; : 0
  },
  ;_seq_no; : 3,
  ;_primary_term; : 1
}
GET /products/_doc/1
{
  ;_index; : ;products;,
  ;_type; : ;_doc;,
  ;_id; : ;1;,
  ;_version; : 1,
  ;_seq_no; : 0,
  ;_primary_term; : 1,
  ;found; : true,
  ;_source; : {
    ;title; : ;iphone13;,
    ;price; : 8999.99,
    ;created_at; : ;2021-09-15;,
    ;description; : ;iPhone 13屏幕采用6.1英寸OLED屏幕;
  }
}
DELETE /products/_doc/1
{
  ;_index; : ;products;,
  ;_type; : ;_doc;,
  ;_id; : ;1;,
  ;_version; : 2,
  ;result; : ;deleted;,
  ;_shards; : {
    ;total; : 1,
    ;successful; : 1,
    ;failed; : 0
  },
  ;_seq_no; : 2,
  ;_primary_term; : 1
}
说明: 这种更新方式是先删除原始文档,再将更新文档以新的内容插入,所以再查询时其他没更新的字段会变为空。
PUT /products/_doc/sjfYnXwBVVbJgt24PlVU
{
  ;title;:;iphon15;
}


/*
sjfYnXwBVVbJgt24PlVU 表示文档的id
*/
说明: 这种方式会将数据原始内容保存,并在此基础上更新,也就是说其他字段会保留。
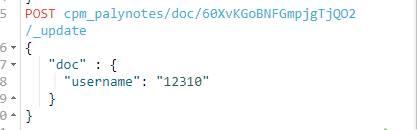
POST /products/_doc/sjfYnXwBVVbJgt24PlVU/_update
{
    ;doc; : {
        ;title; : ;iphon15;
    }
}

/*
sjfYnXwBVVbJgt24PlVU 表示文档的id
*/
所谓批量操作顾名思义就是把一系列数据一次性的放入es中,我们可以对一批数据进行相应的添加、删除、或者更新操作。
在进行批量操作时;会涉及到一些含义
index ;表示添加update;表示更新delte;表示删除# 批量添加两条文档
POST /products/_doc/_bulk
 	{;index;:{;_id;:;1;}}
  		{;title;:;iphone14;,;price;:8999.99,;created_at;:;2021-09-15;,;description;:;iPhone 13屏幕采用6.8英寸OLED屏幕;}
	{;index;:{;_id;:;2;}}
  		{;title;:;iphone15;,;price;:8999.99,;created_at;:;2021-09-15;,;description;:;iPhone 15屏幕采用10.8英寸OLED屏幕;}
# 更新文档并删除另一个文档
POST /products/_doc/_bulk
	{;update;:{;_id;:;1;}}
		{;doc;:{;title;:;iphone17;}}
	{;delete;:{;_id;:2}}
	{;index;:{}}
		{;title;:;iphone19;,;price;:8999.99,;created_at;:;2021-09-15;,;description;:;iPhone 19屏幕采用61.8英寸OLED屏幕;}
说明;批量时不会因为一个失败而全部失败;而是继续执行后续操作;在返回时按照执行的状态返回。每一个操作之间是互不影响的;也就是说一个操作失败了;并不会影响其他的操作;
注:es文档的批量操作中涉及一个文档的内容不能换行

ES中提供了一种强大的检索数据方式,这种检索方式称之为Query DSL ,Query DSL是利用Rest API传递JSON格式的请求体(Request Body)数据与ES进行交互;这种方式的丰富查询语法让ES检索变得更强大;更简洁。
# GET /索引名/_doc/_search {json格式请求体数据}
# GET /索引名/_search {json格式请求体数据}					    // 简写
# 1.创建索引 映射
PUT /products/
{
  ;mappings;: {
    ;properties;: {
      ;title;:{
        ;type;: ;keyword;
      },
      ;price;:{
        ;type;: ;double;
      },
      ;created_at;:{
        ;type;:;date;
      },
      ;description;:{
        ;type;:;text;
      }
    }
  }
}
# 2.插入数据
PUT /products/_doc/_bulk
{;index;:{}}
  {;title;:;iphone12 pro;,;price;:8999,;created_at;:;2020-10-23;,;description;:;iPhone 12 Pro采用超瓷晶面板和亚光质感玻璃背板;搭配不锈钢边框;有银色、石墨色、金色、海蓝色四种颜色。宽度:71.5毫米;高度:146.7毫米;厚度:7.4毫米;重量;187克;}
{;index;:{}}
  {;title;:;iphone12;,;price;:4999,;created_at;:;2020-10-23;,;description;:;iPhone 12 高度;146.7毫米;宽度;71.5毫米;厚度;7.4毫米;重量;162克;5.73盎司; [5]  。iPhone 12设计采用了离子玻璃;以及7000系列铝金属外壳。;}
{;index;:{}}
  {;title;:;iphone13;,;price;:6000,;created_at;:;2021-09-15;,;description;:;iPhone 13屏幕采用6.1英寸OLED屏幕;高度约146.7毫米;宽度约71.5毫米;厚度约7.65毫米;重量约173克。;}
{;index;:{}}
  {;title;:;iphone13 pro;,;price;:8999,;created_at;:;2021-09-15;,;description;:;iPhone 13Pro搭载A15 Bionic芯片;拥有四种配色;支持5G。有128G、256G、512G、1T可选;售价为999美元起。;}
match_all关键字: 返回索引中的全部文档
GET /products/_search
{
  ;query;: {
    ;match_all;: {}
  }
}

/*
products 是索引的名字;其它固定
*/
term 关键字: 用来使用关键词查询
GET /products/_search
{
 ;query;: {
   ;term;: {
     ;price;: {
       ;value;: 4999
     }
   }
 }
}

/*
products表示索引名
price表示是哪个字段的名字
value后面的值表示这个字段的值是什么

比如有的文档字段值为 小浣熊、小小浣熊;我们可以试着搜一搜 浣熊 这个词
*/
NOTE0: 在ES中只有text类型分词;其余类型均不分词。分词的类型可以根据分词查询;不分词的类型只能通过全部内容查询。
NOTE1: 通过使用term查询得知ES中默认使用分词器为标准分词器(StandardAnalyzer),标准分词器对于英文单词分词,对于中文单字分词。 ;text 类型;
NOTE2: 通过使用term查询得知,在ES的Mapping Type 中 keyword , date ,integer, long , double , boolean or ip 这些类型不分词;搜索的时候要使用全部内容搜索;只有text类型分词。
range 关键字: 用来指定查询指定范围内的文档
GET /products/_search
{
  ;query;: {
    ;range;: {
      ;price;: {
        ;gte;: 5,
        ;lte;: 7.8
      }
    }
  }
}

/*
price 表示搜索的字段;一般是数字类型;因为这样的类型会有一个范围。
gte 表示大于等于
lte 表示小于等于
*/
prefix 关键字: 用来检索含有指定前缀的关键词的相关文档
GET /products/_search
{
  ;query;: {
    ;prefix;: {
      ;title;: {
        ;value;: ;ipho;
      }
    }
  }
}
wildcard 关键字: 通配符查询 ? 用来匹配一个任意字符 * 用来匹配多个任意字符
GET /products/_search
{
  ;query;: {
    ;wildcard;: {
      ;description;: {
        ;value;: ;iphon*;
      }
    }
  }
}
ids 关键字 : 值为数组类型,用来根据一组id获取多个对应的文档
GET /products/_search
{
  ;query;: {
    ;ids;: {
      ;values;: [1,2,4]
    }
  }
}
fuzzy 关键字: 用来模糊查询含有指定关键字的文档
GET /products/_search
{
  ;query;: {
    ;fuzzy;: {
      ;description;: ;小浣猫;
    }
  }
}
注意: fuzzy 模糊查询 最大模糊错误 必须在0-2之间
搜索关键词长度小于等于 2 不允许存在模糊
搜索关键词长度为3-5 允许一次模糊
搜索关键词长度大于5 允许最大2模糊
bool 关键字: 用来组合多个条件实现复杂查询
must: 相当于&& 同时成立
should: 相当于|| 成立一个就行
must_not: 相当于! 不能满足任何一个
GET /products/_search
{
  ;query;: {
    ;bool;: {
      ;must;: [
        {;term;: {
          ;price;: {
            ;value;: 4999
          }
        }},{
        	;ids;:{
        		;value;: [1]
        	}
        }
      ]
    }
  }
}
GET /products/_search
{
  ;query;: {
    ;multi_match;: {
      ;query;: ;iphone13 毫;,
      ;fields;: [;title;,;description;]
    }
  }
}

query  后面的内容表示检索的关键词
fields 后面的内容表示检索的字段

注意: 如果字段类型分词,将查询条件分词之后再查询该字段  如果该字段不分词就会将查询条件作为整体进行查询
GET /products/_search
{
  ;query;: {
    ;query_string;: {
      ;default_field;: ;description;,
      ;query;: ;屏幕真的非常不错;
    }
  }
}

default_field 后面写查询字段的类型
query					后面写查询的关键词

注意: 查询字段分词就将查询条件分词查询  查询字段不分词将查询条件不分词查询
注:在ES7中只有能分词的字段才可以使用高亮,即text类型
高亮并没有直接修改原始文档,而是单独的把高亮的结果又放到了一个highlight里
highlight 关键字: 可以让符合条件的文档中的关键词高亮
GET /products/_search
{
  ;query;: {
    ;term;: {
      ;description;: {
        ;value;: ;iphone;
      }
    }
  },
  ;highlight;: {
    ;fields;: {
      ;*;:{}
    }
  }
}
自定义高亮html标签: 可以在highlight中使用pre_tags和post_tags
GET /products/_search
{
  ;query;: {
    ;term;: {
      ;description;: {
        ;value;: ;iphone;
      }
    }
  },
  ;highlight;: {
    ;post_tags;: [;</span>;],
    ;pre_tags;: [;<span style=;color:red;>;],
    ;fields;: {
      ;*;:{}
    }
  }
}
多字段高亮 使用require_field_match开启多个字段高亮
GET /products/_search
{
  ;query;: {
    ;term;: {
      ;description;: {
        ;value;: ;iphone;
      }
    }
  },
  ;highlight;: {
    ;require_field_match;: ;false;,
    ;post_tags;: [;</span>;],
    ;pre_tags;: [;<span style=;color:red;>;],
    ;fields;: {
      ;*;:{}
    }
  }
}
size 关键字: 指定查询结果中返回指定条数。 默认返回值10条
GET /products/_search
{
  ;query;: {
    ;match_all;: {}
  },
  ;size;: 5
}
from 关键字: 用来指定起始返回位置;和size关键字连用可实现分页效果
GET /products/_search
{
  ;query;: {
    ;match_all;: {}
  },
  ;size;: 5,
  ;from;: 0
}
GET /products/_search
{
  ;query;: {
    ;match_all;: {}
  },
  ;sort;: [
    {
      ;price;: {
        ;order;: ;desc;
      }
    }
  ]
}

/*
desc		降序,默认就是降序
asc			升序
*/
_source 关键字: 是一个数组,在数组中用来指定展示那些字段
GET /products/_search
{
  ;query;: {
    ;match_all;: {}
  },
  ;_source;: [;title;,;description;]
}
倒排索引;Inverted Index;也叫反向索引;有反向索引必有正向索引。通俗地来讲;正向索引是通过key找value;反向索引则是通过value找key。ES底层在检索时底层使用的就是倒排索引。
ES的索引区部件存储了value-key这样的映射,还会存储每个字出现的次数以及文章的长度用来计算相关度的得分.
ES的元数据区用来存储一条一条完整的文档.
现有索引和映射如下:
{
  ;products; : {
    ;mappings; : {
      ;properties; : {
        ;description; : {
          ;type; : ;text;
        },
        ;price; : {
          ;type; : ;float;
        },
        ;title; : {
          ;type; : ;keyword;
        }
      }
    }
  }
}
先录入如下数据;有三个字段title、price、description等
在ES中除了text类型分词;其他类型不分词;因此根据不同字段创建索引如下;
title字段:
price字段
description字段
注意: Elasticsearch分别为每个字段都建立了一个倒排索引。因此查询时查询字段的term,就能知道文档ID;就能快速找到文档。

Analysis; 文本分析是把全文本转换一系列单词(term/token)的过程;也叫分词(Analyzer)。Analysis是通过Analyzer来实现的。分词就是将文档通过Analyzer分成一个一个的Term(关键词),每一个Term都指向包含这个Term的文档。
注意: 在ES中默认使用标准分词器: StandardAnalyzer 特点: 中文单字分词 单词分词
我是中国人 this is good man----> analyzer----> 我 是 中 国 人 this is good man
分析器;analyzer;都由三种构件组成的;character filters ; tokenizers ; token filters。
character filter 字符过滤器
在一段文本进行分词之前;先进行预处理;比如说最常见的就是;过滤html标签;hello --> hello;;& --> and;I&you --> I and you;tokenizers 分词器
英文分词可以根据空格将单词分开,中文分词比较复杂,可以采用机器学习算法来分词。Token filters Token过滤器
将切分的单词进行加工。大小写转换;例将“Quick”转为小写;;去掉停用词;例如停用词像“a”、“and”、“the”等等;;加入同义词;例如同义词像“jump”和“leap”;。注意:
三者顺序: Character Filters—>Tokenizer—>Token Filter三者个数;Character Filters;0个或多个; ; Tokenizer ; Token Filters(0个或多个)POST /_analyze
{
;analyzer;: ;standard;,
;text;: ;this is a , good Man 中华人民共和国;
}
POST /_analyze
{
  ;analyzer;: ;simple;,
  ;text;: ;this is a , good Man 中华人民共和国;
}
POST /_analyze
{
  ;analyzer;: ;whitespace;,
  ;text;: ;this is a , good Man 中华 人民共和国;
}
PUT /索引名
{
  ;settings;: {},
  ;mappings;: {
    ;properties;: {
      ;title;:{
        ;type;: ;text;,
        ;analyzer;: ;standard; //显示指定分词器
      }
    }
  }
}
在ES中支持中文分词器非常多 如 smartCN、IK 等;推荐的就是 IK分词器。
开源分词器 Ik 的github:https://github.com/medcl/elasticsearch-analysis-ik
注意 IK分词器的版本要与你安装ES的版本一致注意 Docker 容器运行 ES 安装插件目录为 /usr/share/elasticsearch/plugins# 一、普通方式安装
# 1. 下载对应版本
- [es;linux ~]$ wget https://github.com/medcl/elasticsearch-analysis-ik/releases/download/v7.14.0/elasticsearch-analysis-ik-7.14.0.zip

# 2. 创建一个文件夹ik-7.14.0并将ik分词器压缩包解压到这个文件夹,然后上传到linux中

# 3. 移动到es安装目录的plugins目录中
- [es;linux ~]$ ls elasticsearch-7.14.0/plugins/
	[es;linux ~]$ mv elasticsearch elasticsearch-7.14.0/plugins/
	[es;linux ~]$ ls elasticsearch-7.14.0/plugins/
	 	elasticsearch
	[es;linux ~]$ ls elasticsearch-7.14.0/plugins/elasticsearch/
		commons-codec-1.9.jar    config                               httpclient-4.5.2.jar  		plugin-descriptor.properties
		commons-logging-1.2.jar  elasticsearch-analysis-ik-6.2.4.jar  httpcore-4.4.4.jar

# 4. 重启es生效

# 5. 本地安装ik配置目录为
- es安装目录中/plugins/analysis-ik/config/IKAnalyzer.cfg.xml
# 二、docker方式安装
# 1. 下载对应版本

# 2. 创建一个文件夹ik-7.14.0并将ik分词器压缩包解压到这个文件夹,然后上传到linux中docker-compose同目录中

# 3. 编写docker-compose采用数据卷映射方式将ik分词器映射到容器内部
version: ;3.8;
volumes:
  data:
  config:
networks:
  es:
services:
  elasticsearch:
    image: elasticsearch:7.14.0
    ports:
      - ;9200:9200;
      - ;9300:9300;
    networks:
      - ;es;
    environment:
      - ;discovery.type=single-node;
      - ;ES_JAVA_OPTS=-Xms512m -Xmx512m;
    volumes:
      - data:/usr/share/elasticsearch/data
      - config:/usr/share/elasticsearch/config
      - ./ik-7.14.0:/usr/share/elasticsearch/plugins/ik-7.14.0

  kibana:
    image: kibana:7.14.0
    ports:
      - ;5601:5601;
    networks:
      - ;es;
    volumes:
      - ./kibana.yml:/usr/share/kibana/config/kibana.yml
# 4. 重新启动
docker-compose up -d
IK有两种颗粒度的拆分;
ik_smart: 会做最粗粒度的拆分
ik_max_word: 会将文本做最细粒度的拆分
POST /_analyze
{
  ;analyzer;: ;ik_smart;,
  ;text;: ;中华人民共和国国歌;
}

POST /_analyze
{
  ;analyzer;: ;ik_max_word;,
  ;text;: ;中华人民;
}

IK支持自定义扩展词典和停用词典
**扩展词典**就是有些词并不是关键词,但是也希望被ES用来作为检索的关键词,可以将这些词加入扩展词典。**停用词典**就是有些词是关键词,但是出于业务场景不想使用这些关键词被检索到;可以将这些词放入停用词典。定义扩展词典和停用词典可以修改IK分词器中config目录中IKAnalyzer.cfg.xml这个文件。
1. 编辑vim IKAnalyzer.cfg.xml,使用推荐的扩展词典,

<?xml version=;1.0; encoding=;UTF-8;?>
<!DOCTYPE properties SYSTEM ;http://java.sun.com/dtd/properties.dtd;>
<properties>
        <comment>IK Analyzer 扩展配置</comment>
        <!--用户可以在这里配置自己的扩展字典 -->
        <entry key=;ext_dict;>extra_main.dic</entry>
         <!--用户可以在这里配置自己的扩展停止词字典-->
        <entry key=;ext_stopwords;>extra_stopword.dic</entry>
        <!--用户可以在这里配置远程扩展字典 -->
        <!-- <entry key=;remote_ext_dict;>words_location</entry> -->
        <!--用户可以在这里配置远程扩展停止词字典-->
        <!-- <entry key=;remote_ext_stopwords;>words_location</entry> -->
</properties>

2. 编辑ik分词器目录下config目录中的extra_main.dic文件   编码一定要为UTF-8才能生效
	vim extra_main.dic 			在文章末尾加入扩展词即可,每一行一个词

3. 编辑ik分词器目录下config目录中的extra_stopword.dic文件
	vim extra_stopword.dic 	在文章末尾加入停用词即可,每一行一个词

4. 重启es生效(如果是docker的话建议删除容器重新启动,因为可能会有缓存)

/*

扩展词的另一个方法是自己在 config 目录下创建一个 myWord.dic 扩展词典,然后在里面加上扩展词,一行一
个,然后修改 IKAnalyzer.cfg.xml 配置文件,添加上自己的扩展词典.
例:
        <!--用户可以在这里配置自己的扩展字典 -->
        <entry key=;ext_dict;>extra_main.dic;myWord.dic</entry>

*/
注意: 词典的编码必须为UTF-8;否则无法生效!
过滤查询;其实准确来说;ES中的查询操作分为2种: 查询(query)和过滤(filter)。查询即是之前提到的query查询;它 (查询)默认会计算每个返回文档的得分;然后根据得分排序。而过滤(filter)只会筛选出符合的文档;并不计算 得分;而且它可以缓存文档 。所以;单从性能考虑;过滤比查询更快。 换句话说**过滤适合在大范围筛选数据;而查询则适合精确匹配数据。一般应用时; 应先使用过滤操作过滤数据; 然后使用查询匹配数据。**

执行顺序:
过滤 --> 查询 --> ES服务
过滤的速度很快,所以我们一般在查询之前都要进行一下过滤,然后再查询,这样会优化许多.
GET /ems/emp/_search
{
  ;query;: {
    ;bool;: {
      ;must;: [
        {;match_all;: {}} //查询条件
      ],
      ;filter;: {....} //过滤条件
  }
}
常见过滤类型有: term 、 terms 、ranage、exists、ids等filter。
# 使用term过滤
GET /ems/emp/_search
{
  ;query;: {
    ;bool;: {
      ;must;: [
        {;term;: {
          ;name;: {
            ;value;: ;小黑;
          }
        }}
      ],
      ;filter;: {
        ;term;: {
          ;content;:;框架;
        }
      }
    }
  }
}
#使用terms过滤
GET /dangdang/book/_search
{
  ;query;: {
    ;bool;: {
      ;must;: [
        {;term;: {
          ;name;: {
            ;value;: ;中国;
          }
        }}
      ],
      ;filter;: {
        ;terms;: {
          ;content;:[
              ;科技;,
              ;声音;
            ]
        }
      }
    }
  }
}
GET /ems/emp/_search
{
  ;query;: {
    ;bool;: {
      ;must;: [
        {;term;: {
          ;name;: {
            ;value;: ;中国;
          }
        }}
      ],
      ;filter;: {
        ;range;: {
          ;age;: {
            ;gte;: 7,
            ;lte;: 20
          }
        }
      }
    }
  }
}
过滤存在指定字段,获取字段不为空的索引记录使用,获取记录中带有指定字段的,比如name、age
GET /ems/emp/_search
{
  ;query;: {
    ;bool;: {
      ;must;: [
        {;term;: {
          ;name;: {
            ;value;: ;中国;
          }
        }}
      ],
      ;filter;: {
        ;exists;: {
          ;field;:;description;
        }
      }
    }
  }
}
过滤指定 id 的索引记录
GET /ems/emp/_search
{
  ;query;: {
    ;bool;: {
      ;must;: [
        {;term;: {
          ;name;: {
            ;value;: ;中国;
          }
        }}
      ],
      ;filter;: {
        ;ids;: {
          ;values;: [;1;,;2;,;3;]
        }
      }
    }
  }
}
<dependency>
    <groupId>org.springFramework.boot</groupId>
    <artifactId>spring-boot-starter-data-elasticsearch</artifactId>
</dependency>
在工厂中创建客户端工具
下面这种方式是将es的主机和端口写死在代码里,如果要修改的话还得找到确切的位置,不利于维护
;Configuration
public class RestClientConfig extends AbstractElasticsearchConfiguration {
    ;Override
    ;Bean
    public RestHighLevelClient elasticsearchClient() {
        final ClientConfiguration clientConfiguration = ClientConfiguration.builder()
                .connectedTo(;192.168.204.137:9200;)    // es服务的ip和端口
                .build();
        return RestClients.create(clientConfiguration).rest();
    }
}
为了方便以后修改,我们还是建议将es的主机和端口配置到配置文件中,日后注入即可,所以如下;
# 配置文件
# es 主机和端口
elasticsearch.host=192.168.204.137:9200
# 创建客户端
;Configuration
public class RestClientConfig extends AbstractElasticsearchConfiguration {

    ;Value(;${elasticsearch.host};)
    private String host;

    ;Override
    ;Bean
    public RestHighLevelClient elasticsearchClient() {
        final ClientConfiguration clientConfiguration = ClientConfiguration.builder()
                .connectedTo(host)    // es服务的ip和端口
                .build();
        return RestClients.create(clientConfiguration).rest();
    }
}
;Document(indexName = ;products;, createIndex = true)
public class Product {
		;Id
    private Integer id;
    ;Field(type = FieldType.Keyword)
    private String title;
    ;Field(type = FieldType.Float)
    private Double price;
    ;Field(type = FieldType.Text,analyzer=;ik_max_word;)
    private String description;
  	//get set ...
}
//1. ;Document(indexName = ;products;, createIndex = true) 用在类上 作用:代表一个对象为一个文档
		-- indexName属性: 创建索引的名称
    -- createIndex属性: 是否创建索引
//2. ;Id 用在属性上  作用:将对象id字段与ES中文档的_id对应
//3. ;Field(type = FieldType.Keyword) 用在属性上 作用:用来描述属性在ES中存储类型以及分词情况
    -- type: 用来指定字段类型
save方法当文档id不存在时会添加文档,当文档id存在的时候会更新文档.
;Autowired
private ElasticsearchOperations elasticsearchOperations;

;Test
public void testCreate() throws IOException {
  Product product = new Product();
  product.setId(1); //指定id则_id为id(属性上有;Id注解)  不存在id自动生成_id
  product.setTitle(;小浣熊干吃面;);
  product.setPrice(129.11);
  product.setDescription(;小浣熊干吃面真好吃,曾经非常爱吃!;);
  elasticsearchOperations.save(product);
}
;Test
public void testDelete() {
  Product product = new Product();
  product.setId(1);
  String delete = elasticsearchOperations.delete(product);
  System.out.println(delete);
}
;Test
public void testGet() {
  Product product = elasticsearchOperations.get(;1;, Product.class); // 文档id   文档转换为什么类型
  System.out.println(product);
}
 ;Test
public void testUpdate() {
  Product product = new Product();
  product.setId(1);
  product.setTitle(;怡宝矿泉水;);
  product.setPrice(129.11);
  product.setDescription(;我们喜欢喝矿泉水,你们喜欢吗....;);
  elasticsearchOperations.save(product);//文档不存在添加,存在更新
}
;Test
public void testDeleteAll() {
  elasticsearchOperations.delete(Query.findAll(), Product.class);
}
;Test
public void testFindAll() {
  SearchHits<Product> productSearchHits = elasticsearchOperations.search(Query.findAll(), Product.class);
  productSearchHits.forEach(productSearchHit -> {
    System.out.println(;id: ; ; productSearchHit.getId());
    System.out.println(;score: ; ; productSearchHit.getScore());
    Product product = productSearchHit.getContent();
    System.out.println(;product: ; ; product);
  });
}
之前配置了 RestClientConfig , 所以 RestHighLevelClient 会在工厂中注册
注;RestHighLevelClient 在使用的时候可能会出现 java.net.SocketTimeoutException: 5,000 milliseconds timeout on connection http-outgoing-0 [ACTIVE] 异常, 在工厂中创建下面的类即可.
import org.apache.http.HttpResponse;
import org.apache.http.impl.client.DefaultConnectionKeepAliveStrategy;
import org.apache.http.protocol.HttpContext;
import org.elasticsearch.client.RestClientBuilder;
import org.springframework.boot.autoconfigure.elasticsearch.RestClientBuilderCustomizer;
import org.springframework.stereotype.Component;

import java.util.concurrent.TimeUnit;

;Component
public class MyRestClientBuilderCustomizer implements RestClientBuilderCustomizer {

    ;Override
    public void customize(RestClientBuilder builder) {
        // keep alive策略
        builder.setHttpClientConfigCallback(httpClientBuilder -> httpClientBuilder.setKeepAliveStrategy(CustomConnectionKeepAliveStrategy.INSTANCE));
    }

    public static class CustomConnectionKeepAliveStrategy extends DefaultConnectionKeepAliveStrategy {

        public static final CustomConnectionKeepAliveStrategy INSTANCE = new CustomConnectionKeepAliveStrategy();

        private CustomConnectionKeepAliveStrategy() {
            super();
        }

        /**
         * 最大keep alive的时间;分钟;
         * 这里默认为10分钟;可以根据实际情况设置。可以观察客户端机器状态为TIME_WAIT的TCP连接数;如果太多;可以增大此值。
         */
        private final long MAX_KEEP_ALIVE_MINUTES = 10;

        ;Override
        public long getKeepAliveDuration(HttpResponse response, HttpContext context) {
            long keepAliveDuration = super.getKeepAliveDuration(response, context);
            // <0 为无限期keepalive
            // 将无限期替换成一个默认的时间
            if(keepAliveDuration < 0){
                return TimeUnit.MINUTES.toMillis(MAX_KEEP_ALIVE_MINUTES);
            }
            return keepAliveDuration;
        }
    }
}
;Autowired
private RestHighLevelClient restHighLevelClient;

;Test
public void testCreateIndex() throws IOException {
  CreateIndexRequest createIndexRequest = new CreateIndexRequest(;products;);    // 索引名字
  // 参数1:指定映射的结构(在kibana写好复制过来)  参数2:指定数据类型
  createIndexRequest.mapping(;{
; ;                           // 指定映射
                             ;    ;properties;: {
; ;
                             ;      ;title;:{
; ;
                             ;        ;type;: ;keyword;
; ;
                             ;      },
; ;
                             ;      ;price;:{
; ;
                             ;        ;type;: ;double;
; ;
                             ;      },
; ;
                             ;      ;created_at;:{
; ;
                             ;        ;type;: ;date;
; ;
                             ;      },
; ;
                             ;      ;description;:{
; ;
                             ;        ;type;: ;text;
; ;
                             ;      }
; ;
                             ;    }
; ;
                             ;  }
; , XContentType.JSON);
  // 参数1:创建索引的请求对象  参数2:请求的配置对象(一般直接使用默认配置)
  CreateIndexResponse createIndexResponse = restHighLevelClient.indices().create(createIndexRequest, RequestOptions.DEFAULT);
  System.out.println(;创建状态:; ; createIndexResponse.isAcknowledged());
  restHighLevelClient.close();
}
;Test
public void testDeleteIndex() throws IOException {
    // 参数1: 删除的索引     参数2: 请求配置对象
    AcknowledgedResponse acknowledgedResponse = restHighLevelClient.indices().delete(new DeleteIndexRequest(;products;), RequestOptions.DEFAULT);
    System.out.println(acknowledgedResponse.isAcknowledged());
}
;Autowired
private RestHighLevelClient restHighLevelClient;

;Test
public void testCreate() throws IOException {
  IndexRequest indexRequest = new IndexRequest(;products;);   // 索引的名称
  indexRequest
    .id(;1;)                 // .id(;1;) 表示指定_id
    .source(;{
; ;
            ;          ;id; : 1,
; ;
            ;          ;title; : ;蓝月亮;,
; ;
            ;          ;price; : 123.23,
; ;
            ;          ;description; : ;这个洗衣液非常不错哦;;
; ;
            ;        };,XContentType.JSON);
  // 参数1:索引的请求对象  参数2:请求的配置对象
  IndexResponse index = restHighLevelClient.index(indexRequest, RequestOptions.DEFAULT);
  System.out.println(index.status());     // 创建的状态
}
;Test
public void testUpdate() throws IOException {
  // 参数1:去哪个索引中更新  参数2:需要更新的文档的_id
  UpdateRequest updateRequest = new UpdateRequest(;products;,;1;);
  updateRequest.doc(;{;title;:;好月亮;};,XContentType.JSON); // 保留原始数据的基础之上再做更新
  // 参数1:更新的请求对象  参数2:请求的配置对象
  UpdateResponse update = restHighLevelClient.update(updateRequest, RequestOptions.DEFAULT);
  System.out.println(update.status());
}
;Test
public void testDelete() throws IOException {
  // 参数1:删除哪个索引中的文档  参数2:删除的文档的id
  DeleteRequest deleteRequest = new DeleteRequest(;products;,;t8KzZ4MBTPbYjF27ZPRx;);
  // 参数1:删除的请求对象  参数2:请求的配置对象
  DeleteResponse delete = restHighLevelClient.delete(deleteRequest, RequestOptions.DEFAULT);
  System.out.println(delete.status());
}
;Test
public void testQueryById() throws IOException {
  // 参数1:查询哪个索引中的文档  参数2:删除的文档的id
  GetRequest getRequest = new GetRequest(;products;,;1;);
  // 参数1:查询的请求对象        参数2:请求的配置对象     返回值:查询的响应对象
  GetResponse getResponse = restHighLevelClient.get(getRequest, RequestOptions.DEFAULT);
  System.out.println(getResponse.getSourceAsString());
}
;Test
public void testSearchAll() throws IOException {
  // 搜索哪个索引的文档
  SearchRequest searchRequest = new SearchRequest(;products;);
  // 指定条件对象
  SearchSourceBuilder sourceBuilder = new SearchSourceBuilder();
  // 为条件对象指定条件           查询所有
  sourceBuilder.query(QueryBuilders.matchAllQuery());
  // 指定查询条件
  searchRequest.source(sourceBuilder);
  // 参数1:搜索的请求对象   参数2:请求的配置
  SearchResponse searchResponse = restHighLevelClient.search(searchRequest, RequestOptions.DEFAULT);
  System.out.println(searchResponse.getHits().getTotalHits().value); // 获取总条数
  SearchHit[] hits = searchResponse.getHits().getHits();    // 获取结果
  for (SearchHit hit : hits) {
    System.out.println(hit.getSourceAsString());
  }
}
public void testQuery() throws IOException {
    // 搜索哪个索引的文档
    SearchRequest searchRequest = new SearchRequest(;products;);
    SearchSourceBuilder sourceBuilder = new SearchSourceBuilder();
    // 1.term 查询(关键词查询)
    //sourceBuilder.query(QueryBuilders.termQuery(;description;,;衣;));  // 基于关键词查询
    // 2. range 查询(范围查询)
    //sourceBuilder.query(QueryBuilders.rangeQuery(;price;).gt(0).lte(10));
    // 3. prefix 前缀查询
    //sourceBuilder.query(QueryBuilders.prefixQuery(;title;, ;蓝;));
    // 4. wildcard 通配符查询  ? : 一个字符    * : 任意多个字符
    //sourceBuilder.query(QueryBuilders.wildcardQuery(;title;, ;蓝*;));
    // 5. ids 查询(多id查询)
    //sourceBuilder.query(QueryBuilders.idsQuery().addIds(;1;).addIds(;2;));
    // 6. multi_match 查询(多字段查询)    在什么字段
    sourceBuilder.query(QueryBuilders.multiMatchQuery(;非常;, ;title;, ;description;));
    searchRequest.source(sourceBuilder);
    // 参数1:搜索的请求对象   参数2:请求的配置对象
    SearchResponse searchResponse = restHighLevelClient.search(searchRequest, RequestOptions.DEFAULT);
    System.out.println(;符合条件的总条数: ; ; searchResponse.getHits().getTotalHits().value);
    System.out.println(;符合查询到的文档中的最大分数: ; ; searchResponse.getHits().getMaxScore());
    SearchHit[] hits = searchResponse.getHits().getHits();     // 获取所有符合条件的文档
    for (SearchHit hit : hits) {
        System.out.println(hit.getSourceAsString());
    }
}
/*
分页查询        from: 起始位置  size: 展示的记录数
排序            sort
返回指定的字段   _source
高亮查询        highlighter
 */
;Test
public void testSearchPage() throws IOException {
    // 搜索哪个索引的文档
    SearchRequest searchRequest = new SearchRequest(;products;);
    SearchSourceBuilder sourceBuilder = new SearchSourceBuilder();
    // 创建高亮器
    HighlightBuilder highlightBuilder = new HighlightBuilder();
    highlightBuilder.requireFieldMatch(false).field(;description;).field(;title;).preTags(;<span style=;color:red;>;).postTags(;</span>;);     // 关闭字段匹配,指定哪些字段高亮,使用什么字段高亮
    sourceBuilder
            .query(QueryBuilders.termQuery(;description;, ;不;))    // 基于关键词查询
            .from(0)     // 起始位置
            .size(2)     // 每页显示的条数
            .sort(;price;, SortOrder.DESC)     // 参数1:根据哪个字段排序  参数2:排序方式
            //.fetchSource(new String[]{}, new String[]{;price;})  // 参数1:包含字段数组   参数2:排除字段数组 包含和排除一般不同时使用,根据需要选择一个
            .highlighter(highlightBuilder);           // 高亮查询
    // 默认全部返回
    searchRequest.source(sourceBuilder);
    // 参数1:搜索的请求对象   参数2:请求的配置对象
    SearchResponse searchResponse = restHighLevelClient.search(searchRequest, RequestOptions.DEFAULT);
    System.out.println(;符合条件的总条数: ; ; searchResponse.getHits().getTotalHits().value);
    System.out.println(;符合查询到的文档中的最大分数: ; ; searchResponse.getHits().getMaxScore());
    SearchHit[] hits = searchResponse.getHits().getHits();     // 获取所有符合条件的文档
    for (SearchHit hit : hits) {
        System.out.println(hit.getSourceAsString());
        Map<String, HighlightField> highlightFields = hit.getHighlightFields();
        if (highlightFields.containsKey(;description;)){
            System.out.println(;description高亮结果:; ; highlightFields.get(;description;).fragments()[0]);
        }
        if (highlightFields.containsKey(;title;)){
            System.out.println(;title高亮结果:; ; highlightFields.get(;title;).fragments()[0]);
        }
    }
}
一旦使用了过滤,一定是先进行过滤,然后在过滤的基础之上进行查询.
使用过滤可以一定程度上加快查询的效率.
;Test
public void testFilter() throws IOException {
    // 搜索哪个索引的文档
    SearchRequest searchRequest = new SearchRequest(;products;);
    SearchSourceBuilder sourceBuilder = new SearchSourceBuilder();
    // 创建高亮器
    sourceBuilder
            .postFilter(QueryBuilders.rangeQuery(;price;).gte(10))  // 过滤
            .query(QueryBuilders.termQuery(;description;, ;不;));
    // 默认全部返回
    searchRequest.source(sourceBuilder);
    // 参数1:搜索的请求对象   参数2:请求的配置对象
    SearchResponse searchResponse = restHighLevelClient.search(searchRequest, RequestOptions.DEFAULT);
    System.out.println(;符合条件的总条数: ; ; searchResponse.getHits().getTotalHits().value);
    System.out.println(;符合查询到的文档中的最大分数: ; ; searchResponse.getHits().getMaxScore());
    SearchHit[] hits = searchResponse.getHits().getHits();     // 获取所有符合条件的文档
    for (SearchHit hit : hits) {
        System.out.println(hit.getSourceAsString());
    }
}
先在 java 中创建一个实体类 Product,然后使用kibana在es中创建一个与之对应的索引和映射.
实体类Product
public class Product {

    private Integer id;
    private String title;
    private Double price;
    private String description;

    //get set ...
}
测试类
;SpringBootTest
public class RestHighLevelClientForObject{

    ;Autowired
    private RestHighLevelClient restHighLevelClient;

    /**
     * 将对象放入es中
     */
    ;Test
    public void testIndex() throws IOException {
        Product product = new Product();
        product.setId(1);
        product.setTitle(;小浣熊干吃面;);
        product.setPrice(1.5);
        product.setDescription(;小浣熊真好吃!;);

        // 录入es中
        IndexRequest indexRequest = new IndexRequest(;products;);
        indexRequest.id(product.getId().toString())       // 设置文档的_id
                    .source(new ObjectMapper().writeValueAsString(product), XContentType.JSON);  // 将对象转换为json
        IndexResponse indexResponse = restHighLevelClient.index(indexRequest, RequestOptions.DEFAULT);
        System.out.println(indexResponse.status());
    }

    /*
    从es中查询数据并转换为对象
     */
    ;Test
    public void testSearch() throws IOException {
        SearchRequest searchRequest = new SearchRequest(;products;);
        SearchSourceBuilder sourceBuilder = new SearchSourceBuilder();
        HighlightBuilder highlightBuilder = new HighlightBuilder();
        highlightBuilder.requireFieldMatch(false).field(;description;).preTags(;<span style=;color:red;;>;).postTags(;</span>;); // 设置高亮
        sourceBuilder
                .query(QueryBuilders.termQuery(;description;, ;浣熊;))     // 查询所有
                .from(0)
                .size(30)
                .highlighter(highlightBuilder);
        searchRequest.source(sourceBuilder);
        SearchResponse searchResponse = restHighLevelClient.search(searchRequest, RequestOptions.DEFAULT);

        System.out.println(;符合条件的文档条数: ; ; searchResponse.getHits().getTotalHits().value);
        System.out.println(searchResponse.getHits().getMaxScore());
        List<Product> productList = new ArrayList<>();
        SearchHit[] hits = searchResponse.getHits().getHits();
        for (SearchHit hit : hits) {
            //System.out.println(hit.getSourceAsString());    // json
            Product product = new ObjectMapper().readValue(hit.getSourceAsString(), Product.class);// 将json转为对象
            // 处理高亮
            Map<String, HighlightField> highlightFields = hit.getHighlightFields();
            if(highlightFields.containsKey(;description;)){
                product.setDescription(highlightFields.get(;description;).fragments()[0].toString());
            }
            productList.add(product);
        }
        productList.forEach(product -> System.out.println(product));   // 遍历
    }
}
聚合;英文为Aggregation;是es除搜索功能外提供的针对es数据做统计分析的功能。聚合有助于根据搜索查询提供聚合数据。聚合查询是数据库中重要的功能特性;ES作为搜索引擎兼数据库;同样提供了强大的聚合分析能力。它基于查询条件来对数据进行分桶、计算的方法。有点类似于 SQL 中的 group by 再加一些函数方法的操作。
注意事项;text类型是不支持聚合的。
# 创建索引 index 和映射 mapping
PUT /fruit
{
  ;mappings;: {
    ;properties;: {
      ;title;:{
        ;type;: ;keyword;
      },
      ;price;:{
        ;type;:;double;
      },
      ;description;:{
        ;type;: ;text;,
        ;analyzer;: ;ik_max_word;
      }
    }
  }
}
# 放入测试数据
PUT /fruit/_bulk
{;index;:{}}
  {;title; : ;面包;,;price; : 19.9,;description; : ;小面包非常好吃;}
{;index;:{}}
  {;title; : ;旺仔牛奶;,;price; : 29.9,;description; : ;非常好喝;}
{;index;:{}}
  {;title; : ;日本豆;,;price; : 19.9,;description; : ;日本豆非常好吃;}
{;index;:{}}
  {;title; : ;小馒头;,;price; : 19.9,;description; : ;小馒头非常好吃;}
{;index;:{}}
  {;title; : ;大辣片;,;price; : 39.9,;description; : ;大辣片非常好吃;}
{;index;:{}}
  {;title; : ;透心凉;,;price; : 9.9,;description; : ;透心凉非常好喝;}
{;index;:{}}
  {;title; : ;小浣熊;,;price; : 19.9,;description; : ;童年的味道;}
{;index;:{}}
  {;title; : ;海苔;,;price; : 19.9,;description; : ;海的味道;}
# 根据某个字段进行分组 统计数量
GET /fruit/_search
{
  ;query;: {
    ;match_all;: {}
  },
  ;size;: 0,
  ;aggs;: {
    ;price_group;: {
      ;terms;: {
        ;field;: ;price;
      }
    }
  }
}

/*
;size;: 0  表示只想要聚合的结果,不想要查询的数据
price_group 聚合的名字,自己随便写
price 是对哪个字段进行分组
*/
# 求最大值
GET /fruit/_search
{
  ;query;: {
    ;match_all;: {}
  },
  ;size;: 0,
  ;aggs;: {
    ;price_max;: {
      ;max;: {
        ;field;: ;price;
      }
    }
  }
}

/*
;size;: 0  表示只想要聚合的结果,不想要查询的数据
price_max 表示这个聚合查询的名字,自己随便写
price 表示对哪个字段求最大值
*/
# 求最小值
GET /fruit/_search
{
  ;query;: {
    ;match_all;: {}
  },
  ;size;: 0,
  ;aggs;: {
    ;price_min;: {
      ;min;: {
        ;field;: ;price;
      }
    }
  }
}

/*
;size;: 0  表示只想要聚合的结果,不想要查询的数据
price_min  表示聚合名字,自己随便写
price  表示对哪个字段求最小值
*/
# 求平均值
GET /fruit/_search
{
  ;query;: {
    ;match_all;: {}
  },
  ;size;: 0,
  ;aggs;: {
    ;price_avg;: {
      ;avg;: {
        ;field;: ;price;
      }
    }
  }
}

/*
;size;: 0  表示只想要聚合的结果,不想要查询的数据
price_avg  表示聚合名字,自己随便写
price  表示对哪个字段求平均值
*/
# 求和
GET /fruit/_search
{
  ;query;: {
    ;match_all;: {}
  },
  ;size;: 0,
  ;aggs;: {
    ;price_sum;: {
      ;sum;: {
        ;field;: ;price;
      }
    }
  }
}

/*
;size;: 0  表示只想要聚合的结果,不想要查询的数据
price_sum  表示聚合名字,自己随便写
price  表示对哪个字段求和
*/
测试类
;SpringBootTest
public class RestHighLevelClientForAggs {

    ;Autowired
    private RestHighLevelClient restHighLevelClient;

    /**
     * 基于 term 类型进行聚合   基于字段进行分组聚合
     */
    ;Test
    public void testAggs() throws IOException {
        SearchRequest searchRequest = new SearchRequest(;fruit;);
        SearchSourceBuilder searchSourceBuilder = new SearchSourceBuilder();
        searchSourceBuilder
                .query(QueryBuilders.matchAllQuery())     // 设置查询条件
                // 聚合名字(自己随便起)    对哪个字段进行聚合       下面这段意思是对指定字段分组
                .aggregation(AggregationBuilders.terms(;price_group;).field(;price;))  // 设置聚合处理
                .size(0);       // 只要聚合的结果,不要查询到的文档
        searchRequest.source(searchSourceBuilder);
        SearchResponse searchResponse = restHighLevelClient.search(searchRequest, RequestOptions.DEFAULT);

        // 处理聚合的结果
        Aggregations aggregations = searchResponse.getAggregations();
        // 由聚合的名字继续处理
        ParsedDoubleTerms aggregation = aggregations.get(;price_group;); //price是double类型,所以用ParsedDoubleTerms

        List<? extends Terms.Bucket> buckets = aggregation.getBuckets();
        for (Terms.Bucket bucket : buckets) {
            System.out.println(bucket.getKey() ; ; ; ; bucket.getDocCount());
        }
    }

    /**
     * max(ParsedMax接收) min(ParsedMin接收) sum(ParsedSum接收) avg(ParsedAvg接收) 聚合查询    桶中只有一个返回值
     */
    ;Test
    public void testAggsFunction() throws IOException {
        SearchRequest searchRequest = new SearchRequest(;fruit;);
        SearchSourceBuilder searchSourceBuilder = new SearchSourceBuilder();
        searchSourceBuilder
                .query(QueryBuilders.matchAllQuery())     // 设置查询条件
                // 聚合名字(自己随便起)    对哪个字段进行聚合       下面这段意思是求哪个字段的和
                .aggregation(AggregationBuilders.sum(;sum_price;).field(;price;))  // 设置聚合处理
                .size(0);       // 只要聚合的结果,不要查询到的文档
        searchRequest.source(searchSourceBuilder);
        SearchResponse searchResponse = restHighLevelClient.search(searchRequest, RequestOptions.DEFAULT);

        // 处理聚合的结果
        Aggregations aggregations = searchResponse.getAggregations();
        // 由聚合的名字继续处理
        ParsedSum parsedSum = aggregations.get(;sum_price;);//返回的类型是求和数据, 所以使用ParsedSum
        System.out.println(parsedSum.getValue());
    }
}
求不同价格的数量
// 求不同价格的数量
;Test
public void testAggsPrice() throws IOException {
  SearchRequest searchRequest = new SearchRequest(;fruit;);
  SearchSourceBuilder sourceBuilder = new SearchSourceBuilder();
  sourceBuilder.aggregation(AggregationBuilders.terms(;group_price;).field(;price;));
  searchRequest.source(sourceBuilder);
  SearchResponse searchResponse = restHighLevelClient.search(searchRequest, RequestOptions.DEFAULT);
  Aggregations aggregations = searchResponse.getAggregations();
  ParsedDoubleTerms terms = aggregations.get(;group_price;);
  List<? extends Terms.Bucket> buckets = terms.getBuckets();
  for (Terms.Bucket bucket : buckets) {
    System.out.println(bucket.getKey() ; ;, ;; bucket.getDocCount());
  }
}
求不同名称的数量
// 求不同名称的数量
;Test
public void testAggsTitle() throws IOException {
  SearchRequest searchRequest = new SearchRequest(;fruit;);
  SearchSourceBuilder sourceBuilder = new SearchSourceBuilder();
  sourceBuilder.aggregation(AggregationBuilders.terms(;group_title;).field(;title;));
  searchRequest.source(sourceBuilder);
  SearchResponse searchResponse = restHighLevelClient.search(searchRequest, RequestOptions.DEFAULT);
  Aggregations aggregations = searchResponse.getAggregations();
  ParsedStringTerms terms = aggregations.get(;group_title;);
  List<? extends Terms.Bucket> buckets = terms.getBuckets();
  for (Terms.Bucket bucket : buckets) {
  	System.out.println(bucket.getKey() ; ;, ;; bucket.getDocCount());
  }
}
求和
// 求和
;Test
public void testAggsSum() throws IOException {
  SearchRequest searchRequest = new SearchRequest(;fruit;);
  SearchSourceBuilder sourceBuilder = new SearchSourceBuilder();
  sourceBuilder.aggregation(AggregationBuilders.sum(;sum_price;).field(;price;));
  searchRequest.source(sourceBuilder);
  SearchResponse searchResponse = restHighLevelClient.search(searchRequest, RequestOptions.DEFAULT);
  ParsedSum parsedSum = searchResponse.getAggregations().get(;sum_price;);
  System.out.println(parsedSum.getValue());
}
一个集群就是由一个或多个节点组织在一起;它们共同持有你整个的数据;并一起提供索引和搜索功能。一个集群由一个唯一的名字标识;这个名字默认就是elasticsearch。这个名字是重要的;因为一个节点只能通过指定某个集群的名字;来加入这个集群。
一个节点是你集群中的一个服务器;作为集群的一部分;它存储你的数据;参与集群的索引和搜索功能。和集群类似;一个节点也是由一个名字来标识的;默认情况下;这个名字是一个随机的漫威漫画角色的名字;这个名字会在启动的时候赋予节点。
一组相似文档的集合
用来定义索引存储文档的结构如;字段、类型等。
索引中一条记录,可以被索引的最小单元
Elasticsearch提供了将索引划分成多份的能力;这些份就叫做分片。当你创建一个索引的时候;你可以指定你想要的分片的数量。每个分片本身也是一个功能完善并且独立的“索引”;这个“索引”可以被放置 到集群中的任何节点上。
Index的分片中一份或多份副本。
因为没有很多的机器,这里我们在一台机器上启动三个es服务,做一个伪分布式.
# 1.准备3个ES节点和一个kibana 节点  ES 9200 9300
- web: 9201 tcp:9301  node-1  elasticsearch.yml
- web: 9202 tcp:9302  node-2  elasticsearch.yml
- web: 9203 tcp:9303  node-3  elasticsearch.yml
- kibana: 5602

# node-1 配置文件
# 指定集群名称 3个节点必须一致
cluster.name: es-cluster
# 指定节点名称 每个节点名字唯一
node.name: node-1
# 开放远程链接
network.host: 0.0.0.0
# 指定使用发布地址进行集群间通信
network.publish_host: 192.168.204.137
# 指定 web 端口
http.port: 9201
# 指定 tcp 端口
transport.tcp.port: 9301
# 指定所有节点的 tcp 通信
discovery.seed_hosts: [;192.168.204.137:9301;, ;192.168.204.137:9302;,;192.168.204.137:9303;]
# 指定可以初始化集群的节点名称
cluster.initial_master_nodes: [;node-1;, ;node-2;,;node-3;]
# 集群最少几个几点可用
gateway.recover_after_nodes: 2
# 解决跨域问题
http.cors.enabled: true
http.cors.allow-origin: ;*;
# node-2 配置文件
# 指定集群名称 3个节点必须一致
cluster.name: es-cluster
# 指定节点名称 每个节点名字唯一
node.name: node-2
# 开放远程链接
network.host: 0.0.0.0
# 指定使用发布地址进行集群间通信
network.publish_host: 192.168.204.137
# 指定 web 端口
http.port: 9202
# 指定 tcp 端口
transport.tcp.port: 9302
# 指定所有节点的 tcp 通信
discovery.seed_hosts: [;192.168.204.137:9301;, ;192.168.204.137:9302;,;192.168.204.137:9303;]
# 指定可以初始化集群的节点名称
cluster.initial_master_nodes: [;node-1;, ;node-2;,;node-3;]
# 集群最少几个几点可用
gateway.recover_after_nodes: 2
# 解决跨域问题
http.cors.enabled: true
http.cors.allow-origin: ;*;
# node-3 配置文件
# 指定集群名称 3个节点必须一致
cluster.name: es-cluster
# 指定节点名称 每个节点名字唯一
node.name: node-2
# 开放远程链接
network.host: 0.0.0.0
# 指定使用发布地址进行集群间通信
network.publish_host: 192.168.204.137.3
# 指定 web 端口
http.port: 9202
# 指定 tcp 端口
transport.tcp.port: 9302
# 指定所有节点的 tcp 通信
discovery.seed_hosts: [;192.168.204.137:9301;, ;192.168.204.137:9302;,;192.168.204.137:9303;]
# 指定可以初始化集群的节点名称
cluster.initial_master_nodes: [;node-1;, ;node-2;,;node-3;]
# 集群最少几个几点可用
gateway.recover_after_nodes: 2
# 解决跨域问题
http.cors.enabled: true
http.cors.allow-origin: ;*;
version: ;3.8;
networks:
  escluster:
services:
  es01:
    image: elasticsearch:7.14.0
    ports:
      - ;9201:9201;
      - ;9301:9301;
    networks:
      - ;escluster;
    volumes:
      - ./node-1/data:/usr/share/elasticsearch/data
      - ./node-1/config/elasticsearch.yml:/usr/share/elasticsearch/config/elasticsearch.yml
      - ./node-1/plugins/ik:/usr/share/elasticsearch/plugins/ik
    environment:
      - ;ES_JAVA_OPTS=-Xms512m -Xmx512m;

  es02:
    image: elasticsearch:7.14.0
    ports:
      - ;9202:9202;
      - ;9302:9302;
    networks:
      - ;escluster;
    volumes:
      - ./node-2/data:/usr/share/elasticsearch/data
      - ./node-2/config/elasticsearch.yml:/usr/share/elasticsearch/config/elasticsearch.yml
      - ./node-2/plugins/ik:/usr/share/elasticsearch/plugins/ik
    environment:
      - ;ES_JAVA_OPTS=-Xms512m -Xmx512m;

  es03:
    image: elasticsearch:7.14.0
    ports:
      - ;9203:9203;
      - ;9303:9303;
    networks:
      - ;escluster;
    volumes:
      - ./node-3/data:/usr/share/elasticsearch/data
      - ./node-3/config/elasticsearch.yml:/usr/share/elasticsearch/config/elasticsearch.yml
      - ./node-3/plugins/ik:/usr/share/elasticsearch/plugins/ik
    environment:
      - ;ES_JAVA_OPTS=-Xms512m -Xmx512m;

  kibana:
    image: kibana:7.14.0
    ports:
      - ;5602:5601;
    networks:
      - ;escluster;
    volumes:
      - ./kibana.yml:/usr/share/kibana/config/kibana.yml
# kibana配置文件 连接到ES
server.host: ;0;
server.shutdownTimeout: ;5s;
elasticsearch.hosts: [ ;http://192.168.204.137:9201; ] #链接任意节点即可
monitoring.ui.container.elasticsearch.enabled: true
http://192.168.204.137:9201/_cat/health?v
1. 访问github网站
	搜索: elasticsearch-head 插件

2. 安装git
	yum install git

3. 将elasticsearch-head下载到本地
	git clone git://github.com/mobz/elasticsearch-head.git

4. 安装nodejs
	#注意: 没有wget的请先安装 yum install -y wget
	wget http://cdn.npm.taobao.org/dist/node/latest-v8.x/node-v8.1.2-linux-x64.tar.xz

5. 解压缩nodejs
	xz -d node-v10.15.3-linux-arm64.tar.xz
	tar -xvf node-v10.15.3-linux-arm64.tar

6. 配置环境变量
	mv node-v10.15.3-linux-arm64 nodejs
	mv nodejs /usr/nodejs
	vim /etc/profile
		export NODE_HOME=/usr/nodejs
		export PATH=$PATH:$JAVA_HOME/bin:$NODE_HOME/bin

7.	进入elasticsearch-head的目录
	npm config set registry https://registry.npm.taobao.org
	npm install
	npm run start


8.  启动访问head插件 默认端口9100
	http://ip:9100  查看集群状态